Hello Dear! How’s Your Writing Journey Going? Do You Enjoy Writing?
Do you enjoy writing blog posts? If yes, AI can make your writing process faster and more efficient. If you don’t, the right AI workflow can make writing much easier—and even more enjoyable. Whether you write blog posts, freelance content, eBooks, or other types of content…
Here in this blog, I explained how you can write AI blog posts that actually rank on Google. I also shared a complete step-by-step tutorial in video form.
Before learning the steps, let’s understand this
Why We Chose these three AI tools;
Perplexity is best for: fast real-time web research and fact-checking
ChatGPT is best for: Planning & Outlines
Claude is best for: Long-form writing
Can You Write Blog Posts With AI and Still Rank on Google?
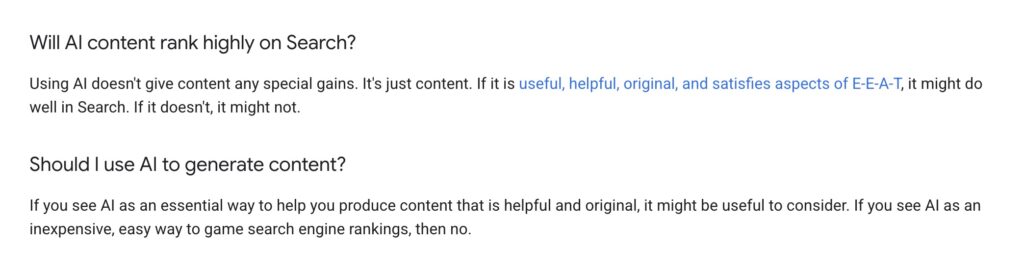
Yes, you can write blog posts with AI and still rank on Google. However, your content needs to demonstrate the principles of Google’s E-E-A-T:
- E = Experience
- E = Expertise
- A = Authoritativeness
- T = Trustworthiness
Google focuses on the quality of content, not how it is produced.

If you write with AI, don’t forget to;
- Include personal experiences, unique data, or expert quotes that AI cannot generate.
- Fix errors, update outdated facts, and ensure the tone matches your brand.
- Answer what the user is actually looking for better than competing pages.
Does Google Penalize AI-Generated Content?
Google does not automatically penalize content simply because AI was used to create it. However, content that is low-quality, unhelpful, misleading, or created primarily to manipulate search rankings may perform poorly or violate Google’s spam policies.
Whether your content is written by a human, generated with AI, or created using a combination of both, focus on producing helpful, original, trustworthy content that genuinely satisfies the reader’s search intent.
What Actually Matters for Google Rankings?
What matters most is whether your content genuinely helps people find the information they are looking for. Your page should match the user’s search intent—whether they are looking for an informational guide, a product, a service, or a specific website.
Google tracks whether searchers find their answer or bounce back immediately to the search results page to try another link.
Related Reading
>>> The 14 Best AI SEO Tools in 2026: Features, Pricing & Honest Reviews
>>> 15 Best AI Text Generators for SEO Content in 2026 (Tried & Tested)
>>> 11 Best Free AI Image Generators in 2026 (We Tested Them All)
Our AI Blog Writing Workflow
Topic → Research → Competitor Analysis → Keyword Research → Content Outline → AI Writing → Editing → SEO Optimization → Publishing
Instead of asking one AI tool to research, outline, and write the entire article, we use different AI tools for different stages of the workflow. This helps us combine research, SEO planning, and long-form writing more effectively.
Step 1: Find Trending Topics & Research With Perplexity
For topic research, competitor analysis, and keyword research, we used Perplexity.
We used a single prompt for this:
Prompt:
Act as an SEO content strategist. Find 10 trending blog topics about AI tools for India and a global audience. For each topic provide: 1. Why it's trending (2026). 2. Target Audience. 3. Search Intent (Informational, Commercial, Transactional, Navigational) 4. Primary keywords, 5. 5 related long-tail keywords. 6. Latest statistics or data with sources. 7. Top 3 competitor articles and what they cover. 8. Content gaps competitors missed. 9. A unique angle to outperform them, 10. Estimated keyword difficulty (Low, medium/High). Present everything in a table.
We got 10 trending topics.
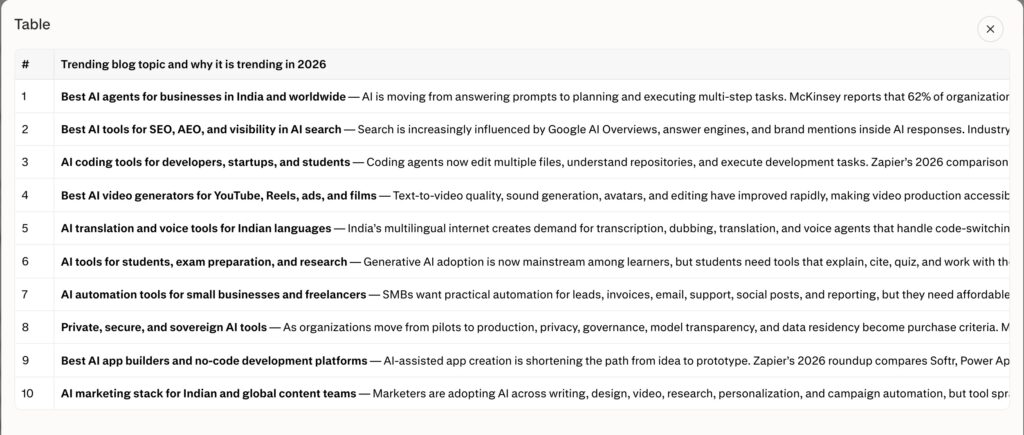
Here, we chose “AI Translation and Voice Tools for Indian Languages” and moved to Step 2.
Step 2: Create an SEO Content Outline With ChatGPT
For creating the content outline, we use ChatGPT because it can turn our research into a structured, SEO-focused content plan.
We gave a prompt to ChatGPT with the topic that we chose from Perplexity.
Prompt:
Act as an expert SEO content strategist. Using the given research, create a complete SEO blog outline. [Paste Your Selected Topic] Include: SEO Title (5 options), Meta Title (under 60 characters), Meta description (under 160 characters), URL slug, Focus keyword, Secondary keywords, Search intent, H1 Title, H2 & H3 heading in a logical order, Suggested introduction hook, Key points to cover under each section, and FAQ Section with (10 relevant questions), Internal linking ideas, External source suggestions, Schema recommendations (FAQ, Article, How-to if applicable). Make the outline optimized for ranking on Google.
ChatGPT gave a complete step-by-step outline, which you can see in the video.
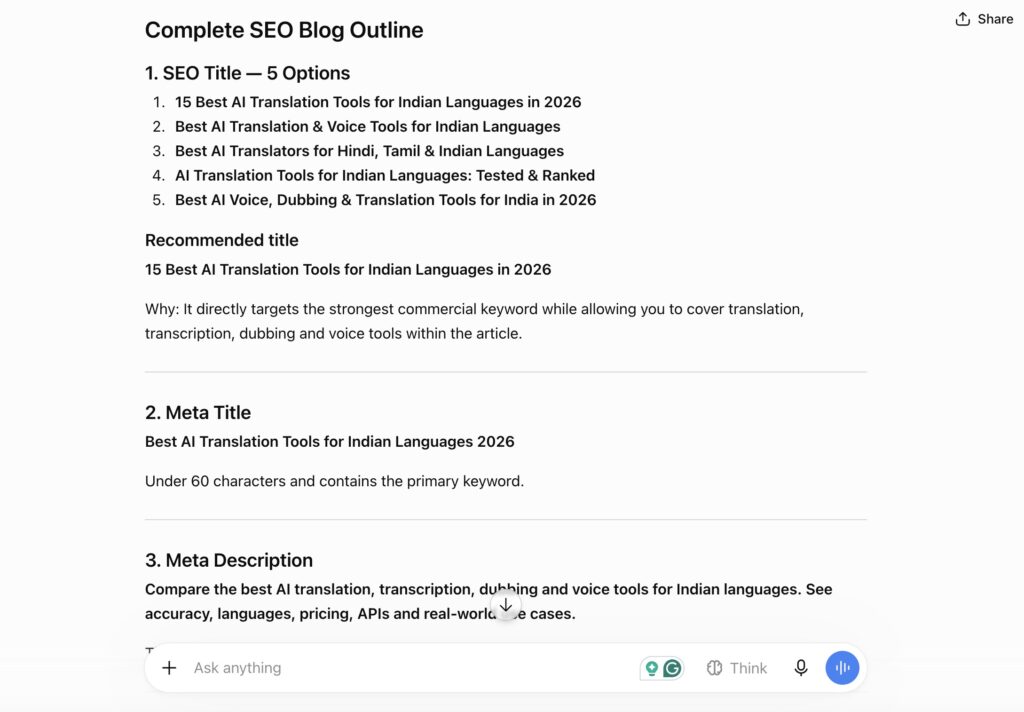
We just copied the outline and opened Claude.
Step 3: Write the First Draft With Claude
Now it’s time to write the article. For this step, we use Claude because it is particularly useful for producing long-form, conversational content.
We gave Claude this prompt and pasted the copied blog post outline.
Prompt:
Act as a professional blog writer. Using the outline, write a 2000-2500-words blog post. Requirements: Human like and conversational tone, Write in simple English, Hook readers in the first 100 words, Naturally include the focus and secondary keywords. Use H2 and H3 headings exactly as provided, Add examples, statistics, and practical insights where relevant, Include bullet points and tables when helpful, Write a strong conclusion with a CTA, Generate as SEO-friendly FAQ section, Ensure originality and avoid keyword stuffing. And return the article in clean Markdown format.
Claude will then use the outline to generate the complete article.
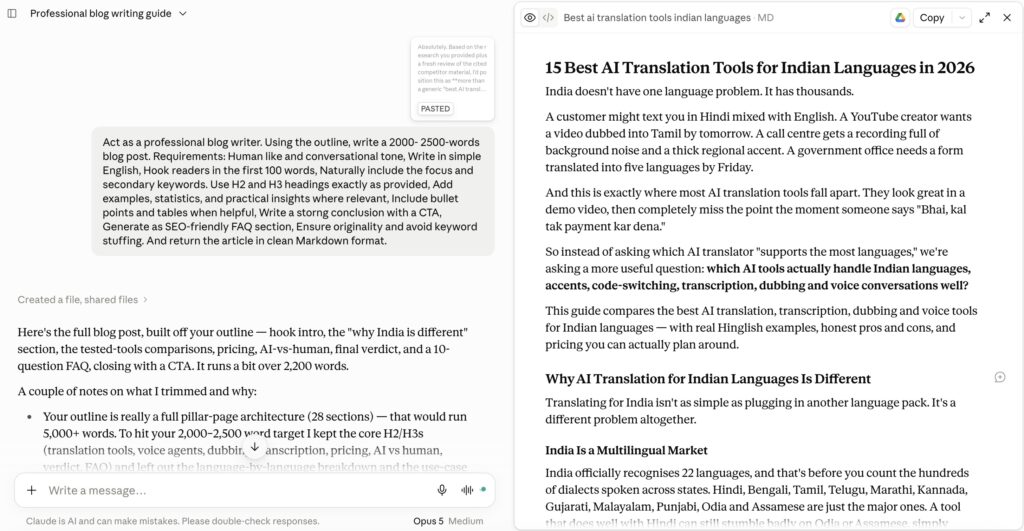
The AI-generated draft gives you a strong starting point, but don’t publish it immediately. Always fact-check statistics, verify sources, review the claims, add your own experience, and edit the article to match your brand voice.
Step 4: Edit, Fact-Check & Add Human Experience
Explain that after Claude generates the article, you should:
- Fact-check statistics
- Verify external sources
- Remove repetitive AI-generated language
- Add personal experience
- Add original examples
- Improve transitions
- Check headings
- Remove unnecessary sections
- Make the tone consistent with your brand
- Check for factual or outdated information
- Ensure keywords sound natural
This will make your article much more valuable than a simple “here are three AI tools” post.
Step 5: Optimize the Article for SEO
- Primary keyword placement
- Secondary keywords
- Title optimization
- Meta title
- Meta description
- URL
- Internal links
- External links
- Image alt text
- Heading structure
- Search intent
- Content freshness
- Schema where appropriate
Step 6: Final SEO Checklist Before Publishing
You could introduce it with:
AI can help you create the article, but don’t publish the first draft. Before publishing, take a few minutes to review the content, verify the information, and make sure the article genuinely helps your readers.
Then use a checklist like this:
✅ Final Blog Publishing Checklist
Content
- Does the article answer the reader’s search intent?
- Is the information accurate and up to date?
- Have you removed unnecessary or repetitive content?
- Did you add your own experience, examples, or insights?
- Does the introduction give readers a reason to continue reading?
- Is the conclusion useful, and does it include a clear CTA?
SEO
- Is the primary keyword naturally included in the title and content?
- Are secondary keywords used naturally?
- Is the H1 clear and relevant?
- Are H2 and H3 headings logically organized?
- Is the meta title optimized?
- Is the meta description compelling?
- Is the URL short and descriptive?
- Have you added relevant internal links?
- Have you included trustworthy external sources where necessary?
- Are images optimized with descriptive alt text?
AI & Quality Check
- Have you fact-checked AI-generated statistics and claims?
- Have you verified the sources?
- Does the article sound like your brand rather than generic AI?
- Have you removed obvious AI-style repetition or filler?
- Does the article provide something better or different from competing pages?
Final Check
- Check grammar and spelling.
- Check formatting on mobile.
- Check all links.
- Preview the article before publishing.
- Publish and monitor its performance.
Remember: AI should help you create better content—not simply more content. The final responsibility for accuracy, originality, and usefulness is still yours.
💡 Common Mistakes to Avoid When Writing Blogs with AI
Instead of presenting this only as a checklist, create a small “Before You Publish” box in the article:
STOP ✋ Before Publishing
Ask yourself 5 questions:
- Does this actually help the reader?
- Is everything factually correct?
- Did I add something competitors don’t have?
- Does it sound like me, not AI?
- Would I personally recommend this article to someone?
That would fit very well with your article’s overall message: use AI for speed, but use human judgment for quality.
Note: For this article, we used Perplexity to identify topics, ChatGPT to create the SEO outline, and Claude to write the first draft. We then manually reviewed the content before publishing.
Input → AI output → Human improvement → Final result
Conclusion
AI won’t replace the need for good writers—it can make good writers more efficient. The key is to use AI as part of your workflow rather than letting it do everything for you. Research with the right tools, build a strong SEO-focused outline, create the first draft with AI, and then add your own expertise, experience, examples, and fact-checking. That’s how you can create content that is not only faster to produce but also genuinely useful to readers.
Ta! Da!

About Naseeb Akhter
The founder of BotBunch, where he researches, tests, and reviews the latest AI tools, automation software, and SaaS platforms. Along with the BotBunch editorial team, he helps creators, students, professionals, and businesses discover the best AI solutions through hands-on testing, honest reviews, detailed comparisons, and easy-to-follow guides.
Join us via email and social channels to get the latest updates straight to your inbox.